Showing posts with label cheese. Show all posts

23 May 2011

Detox Calzones

Blog note: I have just realized that although I've been editing all my photographs to be clearer and brighter, I have consistently been uploading the dark, unedited ones. Argh! I will be (slowly) going back through and redoing most of the photos because of this. Thanks for bearing with me.

It was a long weekend. When we got back, we were desperate for something healthy and fresh, so I suggested pizzas piled high with fresh vegetables. Luckily, Tom volunteered to make the dough (I do hate the hassle and mess of making dough), and the recipe he used suggested calzones, so that's where we went. We used asparagus, onion, spring onion, tomato, pepper, sukgat (edible chrysanthemum) and some chopped herbs from our balcony garden. We did not put cheese inside the calzone, but on top. You can substitute whatever you have to hand, because this is more a set of guidelines than an actual recipe. It was really, really good, and did its job as health-overload perfectly.

Dough notes: as mentioned above, we used this yeast-free recipe but Tom reports that he had to add way more flour and only used half the amount of baking powder. I have used this SmittenKitchen recipe to great effect before, as well as the SK pizza dough with wine and honey. You could also go pre-made, too.

Detox Calzones
Makes 2 calzones

Dough (see note above)
1/2 cup cream cheese (with garlic and herbs if possible)
1/2 to 1 cup grated cheese
Seasoning

Vegetable filling:
3 stalks asparagus
1 tablespoon white wine vinegar
1/2 onion
5 spring onions
1 tomato
1/2 red pepper
Handful edible chrysanthemum
1 tablespoon fresh mint
1 tablespoon fresh sage

17 May 2011

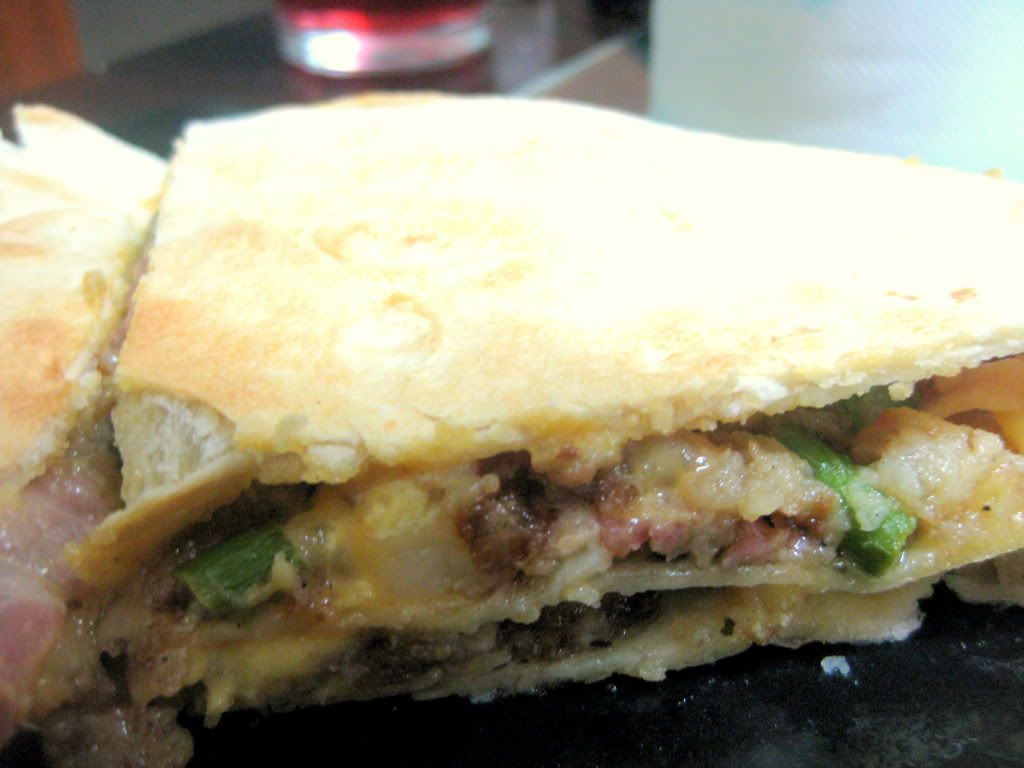
Asparagus Hash Quesadillas

I have another recipe waiting in the wings to be published but this one was too exciting and spring-like to wait. Inspired by SmittenKitchen's asparagus pancetta hash, these quesadillas are bright and filling and surprisingly un-messy to eat. The bacon could easily be omitted for a vegetarian take, and the amount of grated cheese you add is totally up to you - I used about a quarter-cup per storey, which worked perfectly for me but was not quite enough for Tom.

They could technically be oven-free if you fried the quesadillas rather than baking them - this recipe on Pioneer Woman shows you how to do it, with pictures. Also, the amount specified below was enough for dinner for us (one double-decker quesadilla each), but I hasten to add that I knew we each had a quarter of a reduced-price about-to-go-off cheesecake to eat afterwards, so dinner was a little on the small side.


Asparagus Hash Quesadillas
Makes two double-decker quesadillas

2 tablespoons oil
3 large potatoes
1/2 onion
2 garlic cloves
130g asparagus
6 rashers bacon
1 teaspoon mixed herbs
1 tablespoon cream cheese
6 tortilla wraps
Grated cheese
Seasoning

13 April 2011

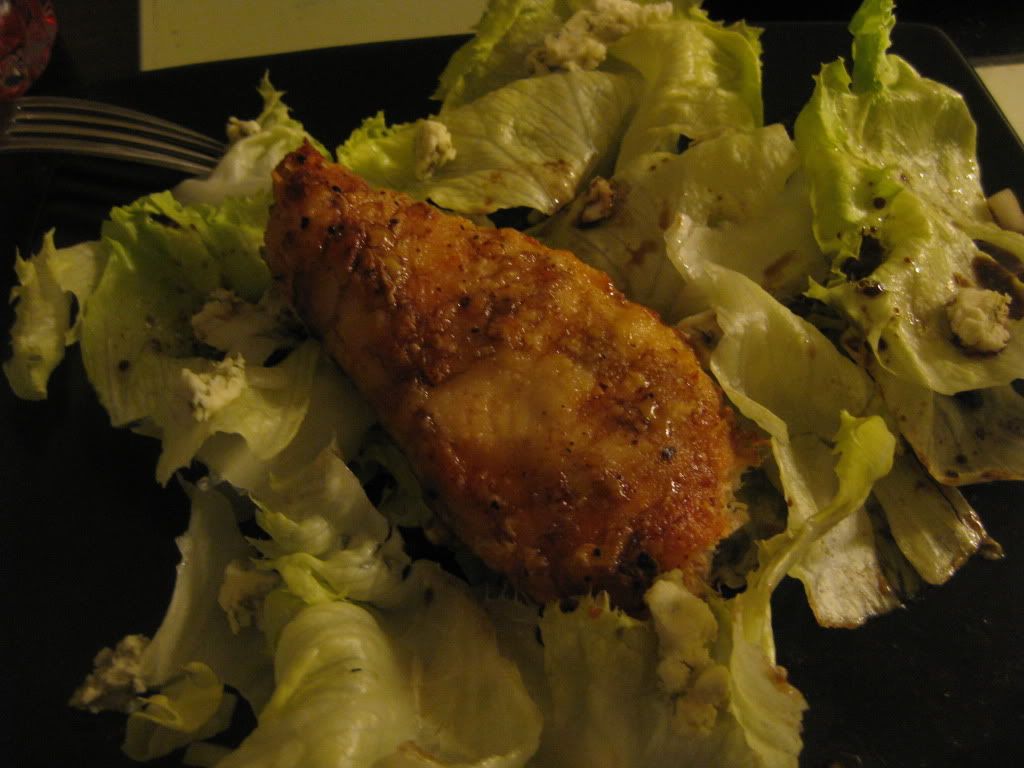
Encrusted Chicken Salad

Okay, so the name of this dish is kind of offputting. I apologize. As you may have noticed from the looooong break in posting, things have been getting a little out of hand here in Korea, what with pests infesting my apartment and suddenly becoming part of a social circle. (The two are not related.) I'm so out of it that I made an awesome sweet & spicy enchilada dish last night, hoping to start a new phase of tweaking my original meal, and completely forgot to photograph it. Just this morning I had to leap into action when I realized that Tom had pretty much started a flood in our kitchen and then left for the gym.

My point is that I'm sorry for both the unexplained hiatus and the name of this dish. But it is crusty chicken! And it's actually really easy and really nice! After a weekend of excess, a simple chicken salad with blue cheese and the world's easiest vinaigrette was perfect.

Encrusted Chicken Salad
Serves 2

2 chicken breasts
3 tablespoons flour
1 tablespoon chilli flakes
Oil
2 portions salad leaves
1/2 cup blue cheese
1 tablespoon each oil, balsamic vinegar, honey, mustard
Seasoning

19 February 2011

Lemon and Mushroom Carbonara

I had big, if vague, plans for dinner last night. There was going to be chicken, and marmalade, and caramelized onions were going to get a look in, and who knows what other exciting things. It was going to be a hodge-podge of super.

And then I looked in the fridge and in the freezer and instead of having four chicken breasts, like I thought, we had exactly zero. So I decided to do burger and chips. But we don't have chips. So I actually had to cook. Carbonara seemed the best way to go, to use up bacon and cream, and then we bought some mushrooms a while ago, and a lemon had been sitting mournfully on its own in the fridge for god-knows-how-long, and - well, dinner happened.

Dinner was good. It was fragrant (I love the smell of lemon) and spicy with the chilli powder: eminently refreshing, and nice to cook. It was slightly too sharp for me, by which I mean after I ate half my meal my throat was burning, so I've scaled back my measurements a little for this recipe, but Tom enjoyed it. The enokitake mushrooms (which Tom will eat! Hurrah!) are chewy, so be warned if that's not your thing, but add a delicious meatiness to a nearly-vegetarian meal. (Feel free to leave the bacon out and call it 'pasta with lemon mushroom sauce', if you prefer.)

Lemon and Mushroom Carbonara
Serves 2

150g spaghetti
1 tablespoon butter (plus some oil, optional)
1 bunch enokitake mushrooms
1/2 onion
1 clove garlic
4 rashers bacon
1 tablespoon white wine vinegar
1 cup cream
1 teaspoon oregano
2 teaspoons chilli powder
1 lemon
1/4 cup grated Parmesan plus more for serving
1 egg
Seasoning

06 February 2011

Apple and Blue Cheese Soup

When my parents were at university, they made stilton and cider soup. When I was at university, I also made stilton and cider soup. It was rich and decadent and the kind of soup that you could spread on toast. Out here in Korea, after buying Blue Cheese! in Seoul, it was the first thing I wanted to make - with, of course, substitutions. I mentioned earlier how we are in a cider-free country (except for the fact that Sprite is known as 'cider', which I swear was only done to annoy me). So, apple it was.

I made this soup alcohol-free, because I did make it just after getting out of bed this morning, but feel free to use cider yourself, or use white wine to deglaze the pan after the onion has softened. Adding a potato will thicken it, and be careful not to over-salt - just keep tasting it until it's right. The blue cheese will make the back of your throat burn slightly as you eat it, which I like, but will make you wary of eating too much.

Apple and Blue Cheese Soup
Makes 3-4 servings

1 tablespoon oil
Half an onion
1 clove garlic
1 tablespoon flour
200ml milk
250ml apple juice
1 apple
1 teaspoon chicken stock powder
60g blue cheese
Seasoning

28 January 2011

Pasta Layer Bake

After my 100th post, I asked on Facebook if there were any particular recipes people wanted to see up here. Surprise surprise, many people asked for east Asian food, like sushi and gyoza! Currently on the list is sushi (particularly sun dried tomato sushi, which sounds delicious), rice balls, crab rolls, gyoza, and dosa. Tom may not enjoy the next one hundred recipes so much.

In the meantime, though, we have one of my very own brain-childs (brain-children?) to get through. It started with the ingredients for a carbonara, a recent carbonara meal turning me off that particular idea, and a very unenthusiastic teacher who hands round colouring pencils and then doodles dinner suggestions. Aren't my students lucky?

Dinner was great - Tom went back for thirds, claiming that he could just keep eating it (a claim well-proven), and I had it for lunch today, and there's still a serving or two left in the pan. It has creamy pasta, broccoli, bacon, cheese, and some yellow pepper thrown in for a bit of a crunch. I imagine it would make a great family meal, particularly as a way to sneak vegetables to small children. Experiment with it!

Pasta Layer Bake
Serves 6

200g pasta
1 head broccoli
1/2 onion
2 garlic cloves
2 chicken breasts
1/2 cup white wine
400ml chicken stock
200ml cream
Basil and thyme
Seasoning

For layering:
10 rashers of bacon
1 bell pepper
1 cup of crushed cheese-flavoured crisps or tortilla chips
1/2 cup grated cheese

16 January 2011

Stuffed Chicken with Roasted Cubes

I now have a new feature on this blog: printable recipes! A (Printable Recipe) link at the start of the list of ingredients takes you to a page where the recipe has been copied up, minus pictures and other frivolities. Scroll to the bottom and amongst all the little blue text ("Sign In, Recent Site Activity, Terms & Conditions") there is a little link that says "Print Page." It should be easy to use, and I hope you enjoy it.

So, a recipe. I decided to re-do one of my essential recipes (the stuffed chicken) and out came this. Ideally, though, the recipe is made with soft and mature cheeses, rather than milk and mayonnaise and the plastic-y stuff here. This is my recipe, but it does come from BBC Good Food's mustard-stuffed chicken which I would much rather eat. Rearrange these words to make the sentence that most often falls out of my mouth these days: Korea no sigh cheese in.

Last night's dinner was fairly easy and pretty tasty. There was a very herbal quality to it, despite only including half a teaspoon of oregano. I felt it lacked cohesion, but then again I'm rapidly becoming a cooking snob so I wouldn't let that bother you. Also, I served it with 'warm broccoli' for a reason: broccoli loses its temperature very quickly, so if you prepare yourself linguistically your dinner won't suffer.

Stuffed Chicken with Roasted Cubes
Serves 2 with extra potato cubes

2 chicken breasts
50ml milk
2 tablespoons mayonnaise
1 teaspoon mustard
1 garlic clove
1/2 cup grated cheese
1/2 teaspoon oregano
4 rashers bacon
Seasoning

3 large sweet potatoes
4 small potatoes
Water
Salt
Oil

Mix the milk, mayonnaise, mustard, chopped garlic clove, cheese and oregano in a bowl and leave it to sit for a while. The mixture needs to be quite thick.

Peel and cube the potatoes and boil them in salted water until soft. Shake roughly in the pan before transferring to an ovenable dish and dousing liberally in oil. Sprinkle some salt over, and put the cubes in the oven for 40 minutes at 220 degrees (430 Fahrenheit) to crisp up.


In the meantime, slit a pocket into each chicken breast and stuff with about 1/3 of the mayonnaise mixture. Wrap two bacon rashers around each breast, and pour the remaining mixture on top. Bake at 220 degrees (430 Fahrenheit) for twenty minutes.


Serve with warm broccoli.


14 January 2011

Mexican Shepherd's Lasagne

I've mentioned already today that the last few days have necessitated quick comfort food. I'm something of an expert at whipping up meals that make me feel better - but only for myself. Tom isn't generally a fan of what I, personally, think of as comfort food. And the lack of decent cheese in Korea has hindered my ability in this area somewhat. (No, I will never stop going on about how much I miss cheese. It's even mentioned in my about me section - that's how deeply I'm affected by this.)

I had defrosted some mince yesterday, so decided that I wanted shepherd's pie. Unfortunately I didn't have the energy for mashing potatoes, and we'll be having shepherd's pie next week anyway (an annual celebration - I'll attempt to explain more at the time). So I thought - tortilla pie. And immediately discarded that thought, because we'd had tortillas the night before. In the end I went for a combination of the two, with a little bit of lasagne-esque layering thrown in - I'm just cool like that.

Dinner was pretty good, with the comfort factor of being able to eat it with a spoon, although the potatoes retained enough crunch to make it just on the wrong side of comfort food. Not necessarily a bad thing. This could easily be made vegetarian following the recipe for mince from the tortilla pie recipe rather than including mince.

Oh, and I shall warn you before you look at the recipe and pictures: this is not a pretty meal.

Mexican Shepherd's Lasagne
(Printable Recipe)
Serves 4 with a side.

1 onion
2 garlic cloves
1 chilli pepper
1 pack of mince (250g)
6 small potatoes
2 tablespoons gravy powder
300ml tomato sauce
Pinch of cinnamon and anchovy powders
1 tablespoon brown sugar
1 tablespoon chilli powder
1 tin kidney beans
1/2 cup red wine
1 tablespoon mayonnaise or sour cream
Grated cheese
Seasoning

Chop the onion, garlic and chilli and fry until softened. Add the mince and stir, breaking up any large clumps, until browned. Sprinkle with gravy powder.

In the meantime, slice the potatoes into thin discs and boil on a medium-high heat until easily pierced with a fork. Peel them first, if you like.

Add the tomato sauce to the mince, along with cinnamon, anchovy, sugar and chilli to taste. Reduce for ten minutes, then add the kidney beans and red wine. (I also added leftover mashed beans from the night before, to thicken the sauce a little - you could skip this step, or mash some beans before adding to the pan.) Cook for a further five minutes before adding a tablespoon of mayonnaise or sour cream to the mince and stirring through.

Drain the potatoes and allow to cool for a moment. In a deep oven dish, spread 1/3 of the mince mixture, cover with 1/3 of the potatoes, and sprinkle a little bit of cheese on top. Repeat until all the ingredients have been layered, using a heavier hand with the cheese on top. Bake at 200 degrees (390 Fahrenheit) for twenty minutes.


Serve.

10 January 2011

Enchiladas

I've mentioned enchiladas a few times before, namely here and here. They are one of my essential recipes, and although they are fairly fiddly and require a fair amount of time and washing up, I consider them an easy meal. They are delicious. So I've decided to post a better version of the recipe, with pictures.

My enchiladas are a storecupboard meal, so the flavour is slightly different each time depending on what's actually in the pantry. Generally, there are onions, sometimes garlic and chilli and bell pepper too. There is mince, usually beef, and a tomato sauce spiked with chilli and sugar to make it taste more like a salsa. The mince is cooked and has some of the sauce added to it, along with grated cheese and mayonnaise, and the mince mixture is spooned into tortillas. The tortillas originally sat on top of a layer of refried beans, which have now (of necessity) been replaced with smashed kidney beans, and are covered in the rest of the sauce and a bunch of cheese before being baked for twenty minutes.

That's the basic idea of the meal.

Serves 2
(2 filled wraps are a medium-large meal for 1 person)

Essential:
1 onion
1 pack of mince (250g)
3 tablespoons of tomato puree and 500ml water
(or 500ml tomato sauce)
Chilli powder
1 tablespoon brown sugar
1 handful grated cheese
1 tablespoon mayonnaise or sour cream
4 tortilla wraps
1 tin of kidney beans
More cheese for topping
Seasoning

Optional:
Garlic
Chilli pepper
Bell pepper
Gravy powder
Red wine
Extra vegetables
Bacon
Use your imagination!

Chop your onion, and garlic, chilli and pepper if using.


Put about 1/3 of the chopped vegetables into a large pan, and the other 2/3 into a small pan. The large pan is for the mince, the small one for the sauce. Fry on a medium heat until softened.

Add the tomato puree and water, or tomato sauce, to the small pan. You need a fairly thick sauce - enough to bind the meat together and cover the final dish. Let the pan simmer for a few moments before adding chilli and sugar to taste, along with other herbs and spices if desired. Add some red wine to the sauce, if using, and season.


In the large pan, add the mince once the onions have been softened. Last night I added 3 rashers of bacon, cut into strips, to the mince pan at this point as well. I usually sprinkle some gravy powder over the mince in its first few seconds of cooking, to darken it a little and make the mixture more gluey when it comes to spooning it into the tortillas.


Once the mince is almost entirely cooked through, add about two-thirds of the sauce to the mince pan, trying to get most of the big lumps of onion and pepper in. Stir through. If you are adding vegetables to the enchiladas, such as broccoli florets, add them to the pan now and allow to simmer on a medium-high heat for five to ten minutes. Season!


Turn the heat off under the small pan.

Add mayonnaise and grated cheese to the cooked mince and stir through.

Get your kidney beans, drain and rinse them, and put them in the microwave on high for one minute.


Mash the beans roughly with a fork and put back in the microwave for another minute to soften them further. Mash again, and spread on the bottom of an oven-proof dish.

Spoon a quarter of the mince mixture into a tortilla and roll it up.


Place the tortillas in the dish, on top of the layer of smashed kidney beans.


Repeat with the other three tortillas. Cover the tortillas in the remaining sauce, sprinkle with grated cheese, and bake at 180 degrees (360 Fahrenheit) for twenty minutes.


Serve, happily.

04 January 2011

Oven-Fried Chicken and Hasselback Potatoes

Yesterday I felt very much like Nigella as I decided to marinade some chicken for dinner about three minutes before we had to leave for work. If only I'd been wearing a lower-cut top, with mood lighting rather than brash sunlight, and a camera crew ready to put everything I needed within arm's reach. Instead I was rushing maniacally around my nonetheless tiny kitchen, grabbing and shaking and stirring and trying to reassure Tom that it would only take a second longer.

Dinner was delicious, and taken from recipes here and here. I've done Hasselback potatoes before, but in the spirit of my only real New Year's resolution (which is to make a bit more of an effort with this blog, in case you couldn't tell) I'll write up the recipe again. With pictures! Oooooh.

You may have noticed a new 'Recipes A-Z' at the top of the page. I'm not sure it's entirely easy to use at the moment, so please comment if you have any suggestions for improvement. Also, if you click on the title of a recipe and then scroll down to the bottom of the recipe, you should see a list of related recipes that might interest you.

In other news, I received Niki Segnit's The Flavour Thesaurus as a late Christmas present, and - wow. Just wow. In a few days I might have gotten over my infatuation with the book enough to talk about it like a normal human being talks about books, but for the moment I'm just going to wallow in my crush.

Oven-Fried Chicken

3 chicken breasts
200ml milk
1 tablespoon lemon vinegar
1 teaspoon lime juice
3 finely chopped garlic cloves
Small handful of chopped onion
1 teaspoon mustard
Spice (I added a teaspoon of ssamjang and a hefty handful of chilli flakes)
1 teaspoon cinnamon
Seasoning

4 crackers
1 slice of bread
1 handful grated cheese
Sprinkle of chilli flakes
1/4 cup flour
2 grindings of black pepper

Mix the milk with the lemon vinegar and lime in a bowl, and leave to stand while you get the other ingredients out. Chop the garlic cloves and onion (I probably used about a quarter of an onion) and add to the slightly-curdled mixture. Add mustard, spice and cinnamon, and stir everything through. Dump the chicken in, turn to coat in the marinade if necessary, cover the bowl, and leave for work.

The chicken should sit in the marinade for at least three hours - mine sat for about eight. In a separate bowl, crumble the crackers and bread and mix with the cheese, chilli flakes, flour and pepper. I used a blender to whizz everything together to make a very fine dust which coated the chicken remarkably evenly.

Marinaded chicken ready to be coated.
Pick up each chicken breast and shake a little to get off any excess drops. Dredge in the coating and put on to a baking tray. If you want the coating to go properly golden, dot some butter on top of the chicken - I forgot to but was nonetheless perfectly happy with the results.

Waiting to go in the oven.
Bake at 200 degrees (390 Fahrenheit) for thirty minutes.

In the meantime, pour the marinade into a heavy-bottomed pan on a low heat. Stir frantically to decrease the likelihood of making flavoured ricotta. After about five minutes, it can be left on the heat to reduce - I left it for about ten minutes until the sauce was the consistency I wanted. Add seasoning, and herbs if wanted. I served this sauce on the side of the meal in a separate bowl in case it was disgusting, but it was actually really nice and added some less-subtle spice to the meal.


Hasselback Potatoes

6 small potatoes
Oil (lots of oil)
Butter
Seasoning

Put each potato in a wooden spoon and cut across at intervals. The wooden spoon will stop you from cutting all the way through, so each potato will fan out as it cooks.

Chopping the Hasselback.
Put onto a baking tray and cover liberally in oil, salt and pepper. Cut small pieces of butter and put one on top of each potato (which should be cut-side up). Roast for forty-five minutes at 200 degrees (390 Fahrenheit), adding more oil halfway through if you think the potatoes don't look crispy enough. Bigger potatoes will take more time, and crispier potatoes (my boyfriend's eternal desire) will also take longer. Serve.

Dinner is served.

29 December 2010

Jam-Ricotta Crescents

This was the second baking adventure of the day (see the first here) and it was extremely successful. The dough was easy and the crescents are both delicious and gorgeous. The pastry is delicate, crumbly and slightly shortbread-y and it feels like cheating to make a pastry this light with barely any work. It is savoury (there is no sugar in the recipe) but the jam sweetens it enough. I made about 20 pastries, most with strawberry jam, some with marmalade. I found the marmalade much softer, so it squidged out from the pastry when I wanted it to stay in the pocket (I lost a couple of crescents that way, sadly) - hence I used less, and the marmalade crescents don't taste much of marmalade. Proper jam seems to do a better job.

Given that there isn't any sugar in the recipe, these could be redone as savoury treats. I think they'd be amazing with cream cheese and caramelized onions inside.

The original recipe calls for farmer's cheese but I made ricotta using about 500ml milk. Instructions for both will be included below.

Jam crescents with ricotta pastry
Jam-Ricotta Crescents
(Printable Recipe)
Makes about 22 pastries

1 cup butter
500ml milk with 1 tablespoon lemon vinegar or 1-2 cups ricotta
2 tablespoons cream with 1 teaspoon lemon vinegar or
2 tablespoons sour cream
1/4 teaspoon vanilla
2 cups flour
1/4 teaspoon salt
Jam (I used strawberry jam and marmalade)
2 tablespoons milk

Soften the butter - I took mine out of the fridge while I was working on the bagel dough, then chopped it into large-ish chunks and microwaved on a low heat for ten seconds. Cream the butter, either with an electric mixer or by hand. If you are creaming by hand, it is best to hold the bowl against your torso rather than leaning over a table. This should take about ten minutes.

In the meantime, pour the milk into a pan and add one tablespoon of vinegar. Leave to curdle for one minute before turning the heat on (low). Stir every so often. After ten minutes the curds and whey will have separated - pour the pan's contents through a colander lined with cloth (as shown below, and as discussed before here). Leave to drip for five minutes. Alternately, skip this entire paragraph and use bought ricotta.

Fresh ricotta
In a separate cup, mix two tablespoons of cream with one teaspoon of vinegar to make sour cream. Allow to stand for a minute to curdle. Alternatively, use two tablespoons of sour cream.

Mix the creamed butter with the ricotta, sour cream and vanilla and stir everything through. Add the flour and salt. At this point I found that I needed to use my hands to shape the dough as it was just separating into small shaggy bits - I buttered my hands lightly and kneaded the dough in its bowl until it came together, which didn't take long. Shape the dough into a ball, wrap in plastic, and chill for at least three hours. My dough went in the fridge for two and a half hours, became rock-hard, and then sat on the counter for another hour and a half before I was ready to start on the next step.

Wrapped and ready to go in the fridge
Once the dough has been chilled, remove the plastic and roll it out on a lightly floured surface.

I only use the best equipment
I rolled the dough until it was about half a centimetre thick. Use a knife or a square cookie cutter to cut squares from the pastry - the closer to perfect the squares are, of course, the better, but getting the ruler out was a step too far for me. Fill each square with a scant half-teaspoon of jam, fold in half into a triangle, and press firmly on the edges to seal the pastry. Roll the right-angled corner over the hypotenuse of the triangle, and twist the ends into a crescent shape. Place on a greased baking tray.

Re-roll the dough scraps and continue cutting squares of pastry until all the dough has been used. Pour the two tablespoons of milk into a bowl and using either a pastry brush or clean fingers, daub each crescent with milk. (An egg wash could also be used here.)

Put the crescents in the oven at 200 degrees (390 Fahrenheit) for ten to fifteen minutes. Oddly, my jam crescents were done after ten, whereas some of the marmalade ones were barely browned after fifteen.

Fresh out of the oven

The original recipe recommends dusting the baked pastries with icing sugar but I skipped this step as I didn't feel it was necessary.

26 December 2010

Christmas Food

Christmas!

Sadly Christmas does not seem to be that big a deal in Korea, but that wasn't going to stop us from going all-out. We spent about twenty-five pounds on a giant slab of beef, drank buck's fizz from 9:30, had monkey bread for breakfast, and cooked enough so that we could recreate Christmas dinner again today from the leftovers, if we felt like it. And probably tomorrow, too.

Also, one of my Christmas presents was a pair of pink spotty pyjamas, so now I really am a cook in pink pyjamas. I'm very happy about this.


Monkey Bread leftovers in tupperware - we needed the cake tin!

Christmas Breakfast: Monkey Bread
Fills one cake tin

2 and 1/2 tablespoons butter
1 cup milk
1/3 cup water
1/4 cup brown sugar
4g instant yeast
3 and 1/4 cups flour (I used 1 and 3/4 bread flour, 1 and 1/2 wheat flour)
2 teaspoons salt
1 tablespoon oil
More flour (I estimate about 300g)
150g butter
Equal amounts brown sugar and cinnamon

Put the milk and water into a medium-sized, microwavable bowl, and heat on a medium temperature in the microwave for one minute. Add the two and a half tablespoons of butter and return to the microwave for another thirty seconds to a minute so that the butter melts into the mixture. Add the quarter-cup of brown sugar and the yeast and stir to combine.

In a big mixing bowl, stir the flour and salt together. I used two different kinds of flour because the first packet was empty after 1 and 3/4 cups! Make a well in the middle of the flour and pour the milk mixture in. Stir with a wooden spoon until the dough has formed, and is quite sticky - this shouldn't take long at all.

Sprinkle a lot of flour on to a clean surface, heavily flouring your hands as you do so, and tip the dough on to it. The original recipe says to "lightly flour" your work surface, but I found that I needed to use probably 300g of flour to get it to the right consistency. Keep the flour nearby and a clean hand (I used Tom's) ready to sprinkle more for you if necessary. Knead the dough until it is smooth and satiny, incorporating any scraps that come apart during the kneading. The original recipe says this should take about ten minutes; for me it took about seven.

Pour most of the oil into a large ovenproof bowl and swish it around (I used my hands to make sure it covered the bottom and sides of the bowl thoroughly). Put the dough into the bowl and cover it with a little more oil. Cover the bowl with foil and put it in the oven at 50 degrees C (120 Fahrenheit) for twenty minutes, after which you can turn the heat off and leave it for another forty. By now it should have doubled in size.

Remove the foil from the bowl and tip the dough on to a work surface - this time the work surface does only need a light dusting of flour. In one bowl, melt the 150g butter; in a second, mix equal parts brown sugar and cinnamon (you can cut back on the cinnamon as much as you like, but Tom is a big fan of it so I went full-on). Pull small pieces from the dough and shape them into balls, about an inch and a half in diameter (bigger than a two-pound coin but smaller than a golf ball). Dip each ball into the butter, then the sugar mixture, and then put back into the ovenproof bowl. I stacked mine to make a pyramid, not bothering with using a fork to dip each ball in the melted butter.

The dough needs to rise again: I covered the bowl with clingfilm and left it on the side overnight (it had at least thirteen hours). The original recipe suggests putting it in a pre-heated then turned-off oven for another fifty to seventy minutes.

When the dough has risen and you are ready to eat, remove the clingfilm from the bowl and put it into an oven at 180 degrees C (360 Fahrenheit). Cook for thirty minutes, leave for five, and then start tearing the whole thing apart. Delicious when warm, but somehow even better when cooled. Very doughnut-esque. It would be wonderful to adapt the dough slightly by lowering the amount of sugar, and making a savoury version with olive oil, herbs, garlic and cheese instead.


For dinner itself we had roasted beef with roast potatoes, pumpkin mash (having forgotten to buy sweet potatoes), cauliflower cheese, pigs in blankets, Yorkshire puddings, broccoli, and mulled wine gravy. The pigs in blankets were simply sausages rolled in bacon and put in the oven for twenty minutes, and the pumpkin mash was made in exactly the same way as normal mash. Sadly it was very watery so we didn't eat much of it, but it should make great leftovers soup. The Yorkshire puddings are very much Tom's area of expertise so I have neither recipe nor experience to share. Our roast potato recipe remains unchanged since Thanksgiving, so here are my beef, cauliflower and gravy recipes. (We were so excited to see cauliflower in Tesco. It was the first time we'd seen it since we came here. Like a Christmas miracle!)


Roasted Beef
Serves 6

1.5kg beef, no bone
2 onions
Oil
Seasoning

In a large oven tray on the stove, heat some oil. Add the beef and sear on all sides. Add the onions, peeled and quartered, and put in the oven at 180 degrees (360 Fahrenheit) for one hour. Lower the temperature to 150 (300 Fahrenheit) and cook for a further two hours for rare meat.


Cauliflower Cheese
Serves 4

Half a head of cauliflower
1 tablespoon butter
1 tablespoon flour
2 cups milk
1/2 cup white wine
1 teaspoon mustard
1 teaspoon cream cheese
1 handful grated cheese
1 cracker
Parmesan dust
Seasoning

Chop the cauliflower into florets and boil at a high heat for five to ten minutes. Drain and transfer to a small baking tray. In the pan, melt some butter and add the flour to form a roux. Add the milk to the roux, whisking thoroughly, along with the wine. Allow the sauce to simmer for a moment. Add the mustard and cream cheese, waiting until both have melted into the sauce before removing the pan from the heat and adding the grated cheese. Stir the sauce through for a few minutes before returning it to the heat and adding parmesan dust and seasoning to taste. Pour over the half-cooked cauliflower and sprinkle grated cheese and crushed cracker over the top. Bake for twenty minutes at 180 degrees (360 Fahrenheit).


Mulled Wine Gravy
Makes about 200ml

Roasting juices
Gravy powder
Red wine
Seasoning

This recipe is necessarily very vague because the amount of roasting juices you get varies massively, as well as the number of people you're hoping to feed with this gravy. Below are my rough estimations, given that I made gravy for two with only a tiny bit left over. You may want to add more or less for taste, also. The mulled wine ice-cube could be replaced with other flavourings, such as mustard or horseradish.

After the beef, or other roasting meat, has been removed from its pan in preparation for carving, take the pan to the stove and put it in a low flame. My roasting juices had the two braised onions in it. Add about one tablespoon of gravy powder, one cup of red wine, one mulled wine ice-cube, and seasoning. Stir. Allow the sauce to bubble for at least five minutes, or until it is needed, before pouring into a jug or gravy boat for serving.

23 December 2010

Branflake Chicken

I don't know if I've mentioned this before, but tomato sauce is only really available in Korea in tins that weigh over three kilograms. We bought a new tin a couple of days ago, and on opening it yesterday, realized that it was actually tomato paste rather than sauce. Great - means it'll last for longer! With our pantry being so cold (it's a couple of degrees warmer than the outside, but stuff has frozen in there), it's brilliant for storing huge amounts of tomato paste without taking up tons of room in our fridge.

The last tin of tomato sauce was disgusting - cheap, and sharp, and with the magical power of making anything it touched inedible. I was very excited to use the new stuff.

Branflake Chicken with Spicy Tomato Pasta
Serves 2 with leftover pasta

2 chicken breasts
2 handfuls bran flakes
1 teaspoon mustard
1 tablespoon grated cheese
1 tablespoon mayonnaise

1 onion
3 garlic cloves
1 green chilli
2-3 tablespoons tomato paste
150ml water
Half a glass red wine
Oregano, basil and seasoning
200g pasta

In one bowl, crush the bran flakes. In another, mix mustard, mayonnaise and cheese. Rub each chicken breast thoroughly with the mayonnaise mixture and then cover with the bran flakes. Put in the oven for twenty five minutes at 200 degrees (390 Fahrenheit).

Put the pasta on. Chop the onion, garlic and chilli and fry on a low heat with oil. When softened and slightly brown, add the tomato paste, along with water. Simmer for a few minutes and then add the red wine. Add herbs and seasoning and allow the sauce to reduce to the desired thickness. When the pasta is cooked, add it to the sauce pan along with a little pasta water and heat through. Serve with the chicken.

14 December 2010

Sweet Potato Gnocchi with Red Wine Sauce

Original recipes can be found here and here. They go surprisingly well together!

This could also be an oven-free recipe if you boiled the sweet potato. I chose to roast it for extra flavour.

Sweet Potato Gnocchi
Makes about 50 gnocchi (enough for 4 meals)

4 large sweet potatoes
Oil
Seasoning

1 and 1/2 cups milk
1/2 cup cream
1 tablespoon lemon juice
1 cheesecloth (I used a clean pillowcase)
Or about 100g ricotta cheese

2 eggs
1 tablespoon brown sugar
1 tablespoon grated fresh ginger
2 cups flour

Peel and cut the sweet potatoes into chunks. Put into a baking dish and toss with salt, pepper and oil. Roast at 180 degrees C for 40-50 minutes. (I layered the sweet potato in a narrow dish and it took about 55 minutes for all of it to cook - if all the potato was at one level it would cook faster.)

In the meantime, make ricotta: mix the milk, cream and lemon juice in a pan and put over a medium heat for five to ten minutes, until the curds and whey have separated. Stir occasionally to minimize any of the milk sticking to the pan. Put your cheesecloth into a colander and drain the ricotta. Leave for two minutes, and then squeeze gently to remove excess whey. Tip the ricotta into a mixing bowl.

Add 2 eggs to the ricotta and beat. Add the brown sugar and grated ginger and stir to combine.

Remove the cooked potato from the oven and mash it, trying to break up any lumps. Spoon the mash into the ricotta-egg mixture and stir everything together. Gradually add the two cups of flour while stirring everything through until you have a slightly sticky dough. With clean hands, pick up about a tablespoon of the dough and roll it into a gnocchi-shaped ball. If the dough sticks to your hands too readily, add some oil and re-mix. (Our potatoes roasted in quite a lot of oil, and I believe this helped the sweet potato dough achieve a texture which made it very easy to work with.)

Make the dough into gnocchi-esque balls - we got fifty exactly from ours. Boil a pan of water and drop some of the gnocchi into it (how many will depend on the size of the pan). Once the gnocchi float (this will take longer for the larger gnocchi, although generally about two to three minutes), remove them from the pan and serve. A regular serving is about thirteen gnocchi balls per adult, I find - although I did eat chocolate afterwards.

If there is any unused gnocchi, do not boil it. This can be refrigerated or frozen. With frozen gnocchi you can boil it exactly the same way as unfrozen gnocchi - it will add no more than a minute to the cooking time.

Red Wine Sauce
Serves 2

1 onion
1 garlic clove
1 cup black raspberry wine (or substitute a slightly sweet red wine)
2 chicken stock cubes
100ml boiling water
1 teaspoon wholegrain mustard
1 teaspoon cream cheese
1 tablespoon soy sauce
1 tablespoon gravy powder
1 tablespoon balsamic vinegar
1 tablespoon thyme
Seasoning

This sauce takes about twenty minutes, so I started mine as the sweet potato came out of the oven and was being mashed; it required very little attention except for the odd taste and stir.

Chop the onion and garlic and fry in oil until soft. Add the red wine and allow the sauce to bubble for two minutes. Add the chicken stock and boiling water and stir. After two minutes, add the mustard and cream cheese. This then simmered for a little over five minutes while I made the gnocchi. In a separate bowl, mix the soy sauce and gravy powder together to form a paste and add this paste to the pan. After five minutes, during which the sauce should have reduced a little, add the balsamic vinegar and thyme. Season to taste. Once the gnocchi is done, this will be ready to serve.

30 November 2010

Sweet Potato Macaroni Cheese

Sweet Potato Macaroni Cheese
Serves 3

250g fusilli pasta
1 onion
1 garlic clove
3 cups mashed sweet potato (leftover from Thanksgiving)
1 cup cream
1 cup milk
1 1/2 tablespoons cream cheese
1 teaspoon mustard
1 tablespoon soju (weak Korean vodka)
1 teaspoon each of basil, rosemary, thyme, parsley and oregano
1 cup grated cheese
3 savoury crackers
Seasoning

1. Put the pasta in boiling water.
2. Chop the onion and garlic finely, and put in a pan on a medium heat with oil.
3. When soft, add the mashed potato and stir for a few moments before adding the cream and milk.
4. Whisk the potato into the liquid to thicken it before adding cream cheese.
5. After five minutes on a low heat, add the mustard, soju and herbs, and allow to simmer for another two minutes.
6. Turn the heat down to the lowest possible setting and add the grated cheese, stirring to melt.
7. Drain the pasta and tip into an oven dish with the sauce. Stir to coat.
8. Sprinkle some more cheese and crushed crackers over the pasta and put in the oven at 180 degrees (360 Fahrenheit) for 20 minutes.
9. Stuff your face.

25 November 2010

Tortillas Galore

Two vegetarian recipes - one good, one mind-blowingly brilliant - for lunch and dinner. Both are extremely easy and can generally be made with what's on hand. The pizza was my idea, although no doubt it's been done before, and the pie came from this recipe. I had planned on using two or three tortillas in the pie, but in the end we only had one left, and it worked well anyway. It's so filling that it's almost shocking that this is vegetarian!

I've used this post as an excuse to add a 'potentially vegetarian' label to all posts that are, or could easily be (by skipping on the meat rather than replacing it), vegetarian.

Tortilla Pizza
Serves 1

1 tortilla wrap
1 tablespoon tomato sauce/passata
1 tablespoon garlic sauce (or minced garlic, or just leave this out)
Handful of grated cheese
Handful of chopped onion
1 tablespoon cream cheese

Use the back of a spoon to spread the tomato and garlic sauces lightly over the (flat) tortilla, leaving a slight margin at the edges. Top with the grated cheese and chopped onion. Blob (yes, blob) bits of cream cheese over the pizza and put in an oven at 180 degrees (360 Fahrenheit) for 5-10 minutes, depending on how crispy you want the 'crust.'


Tortilla Pie
Serves 2

1 1/2 cups rice
1 onion
1 green chilli
1 cup tomato sauce
1 tablespoon sugar
1 tablespoon chilli powder
1 teaspoon curry powder
1 teaspoon ssamjang
1 tin red kidney beans
1 green pepper
1 broccoli stalk
Seasoning
1 tortilla wrap
Grated cheese
Cream cheese

I put the rice on to boil while I chopped the onion and chilli. Fried those for a few minutes before adding tomato sauce, sugar, chilli and curry powders, and ssamjang to make a salsa. Allowed to simmer for a few minutes before adding the kidney beans, chopped pepper, and chopped broccoli stalk. Seasoned, and drained the rice. Once heated through, half of the bean mixture went into a deep dish, and was covered with rice. This was covered with grated cheese and several teaspoons of cream cheese. The remaining bean mixture went on top, was covered with the tortilla, and more grated & cream cheeses. Baked for 15 minutes at 180 degrees (360 Fahrenheit) and served.

21 November 2010

Easy Chicken

Oh my god, this has been a horrific weekend. This morning we woke up hearing scratchy noises, which turned out to be a rat. A rat. A rat in our kitchen. I am so angry and upset and - argh. This is my worst nightmare.

So, to try and distract myself while Tom and the bus driver try to get rid of the little bastard, this is what we had for dinner last night. We discovered that cream cheese was being sold '2 for 1' at Home Plus yesterday (5300W for two packs instead of one!) so dinner was basically a big pile of cream cheese. The pasta didn't turn out brilliantly, funnily enough, and could have used more sauce. Before sprinkling grated cheese on top I could have added more cream cheese, or yoghurt or milk, to make it less dry but we were hungry enough not to care too much. Also, baked chicken stuffed with cream cheese is possibly the best thing I've ever tasted. I've made it before here and here.

We also bought a garlic sauce, which has quite a lot of heat, and used it liberally throughout this dish. Like I said, 'easy chicken.' It probably wouldn't be too hard to blend lots of garlic with chilli, oil and perhaps some cream to make something similar, although I haven't attempted that myself yet.

Cream Cheese Chicken and Pasta
Serves 2

200g pasta
80g cream cheese
2 tablespoons garlic sauce
Boiling water
Seasoning
Grated cheese

2 chicken breasts
20g cream cheese
1 tablespoon garlic sauce
1 teaspoon wholegrain mustard
Handful of grated cheese
Handful of chopped onion
Seasoning

I put the uncooked pasta into a glass baking dish and added enough boiling water to just cover. The cream cheese, garlic sauce and seasoning went in also, and the pasta was baked at 200 degrees (390 Fahrenheit) for 40 minutes. The chicken breasts were slit open to make a pocket. The cream cheese was mixed with garlic sauce, mustard, cheese, onion, salt and pepper, and stuffed into the chicken. The chicken was baked for ten minutes while the pasta sat on top of the oven; the pasta was sprinkled with cheese and both were baked for a further ten.

17 November 2010

Homemade Pizza

So we bought an oven, and yesterday it arrived! Immediately we decided to make pizza for dinner. When I got home, about 9, I made dough (using this recipe) and ricotta (using this one), and left both to sit happily for about an hour. Tom got home and, to cut a looong story short, we ended up accidentally mixing powdered peroxide into the first batch of dough, necessitating a late-night run to the nearest shop for more flour. Great fun. Don't add mysterious powders to your pizzas and you should be okay.

Below are the recipes used; for the pizza we just stretched the dough out flat (making sure it would fit in our oven), pricked it several times with a knife, and topped it with tomato sauce, ricotta, grated cheese, and sliced onion.

Dough
Enough for three small-ish pizzas

2 heaped cups of flour
2 teaspoons salt
3 teaspoons baking powder
1 cup water
1/2 cup vegetable oil

Mix all the ingredients in a bowl until a smooth dough is formed.

Ricotta


2 cups milk
1 tablespoon vinegar
Cheesecloth or alternative (I used a clean pillowcase)
Lemon juice and salt, to taste

This is a complete guess at the amount of ingredients I used, as I just tipped everything into a pan and winged it. Heat the milk slowly on the stove, stirring occasionally. The curds and whey will begin to separate. Sit the cheesecloth (or alternative) in a colander; after about ten minutes, pour the curds and whey through this. Allow the ricotta to rest for a while before moving it into a suitable container. Add lemon juice and salt to taste (I used lemon vinegar so didn't bother with this step). The cheese keeps, in tupperware in the fridge, for about a week.

11 November 2010

Chicken with Mustard Sauce

This week, I've been re-doing recipes rather than trying new ones. Unfortunately, the cheap passata we bought was more like ketchup than tomato sauce, so a second attempt at Tunisian chicken was disgusting. Yesterday, I mixed milk and broccoli pesto to retry the amazing pesto chicken, which worked pretty well but wasn't worth creating a whole separate post for. Basically, pesto + creamy sauce = delicious. And easy.

Tonight was a third night of chicken, inspired by (not really adapted from) this recipe at BBC Good Food. We served it with rice, which is bland anyway, but this dish did lack something. I'm not sure what, and it was perfectly pleasant - I could have had more afterwards - but... yes. Not a meal to impress.

The good news, however, is that this is the first time I've successfully made mustard sauce!

Chicken with Mustard Sauce
Serves 2

Handful of chopped onion
2 chicken breasts
1 tbsp flour
2-3 cups milk
2 tsps cream cheese
1 tbsp parsley or other herb(s)
1 splash white wine
3 tsps wholegrain mustard
Seasoning

The onion was fried in hot oil for a few minutes before the chicken was added, to seal on each side. The flour was sprinkled over and stirred through to make a loose roux, and the milk added. The heat was turned up until the milk was on the point of boiling before being lowered again. Cooked through for ten minutes before the cheese, parsley, wine and mustard were added. Stirred and cooked for another ten minutes until the chicken was no longer pink in the middle. Served over rice.

05 November 2010

Chicken Tetrazzini

On Wednesday night I made chicken tetrazzini, adapted heavily (as usual) from this BBC Good Food recipe. It was good, and creamy, but I still have some cream left over! Argh. Again, I forgot to put broccoli in the dish (like Tuesday's Moroccan chicken, and Thursday's chicken with leftover gravy and rice) so we can all conclude that I have a blind spot in my mind when it comes to vegetables. And I love vegetables! Anyway, the recipe.

Chicken Tetrazzini
Serves 2 (laaaarge portions)

2 chicken breasts
250g pasta
Handful of chopped onion
2 tablespoons flour
300ml chicken stock
200ml cream
Glug of plum wine
1 egg
Seasoning

Other flavourings: soy sauce, 1 sachet ketchup, chilli powder, lemon vinegar, honey, handful of grated cheese, possibly others to taste

I fried the onions in a little bit of oil, adding salt (as per Nigella's recommendation) to release the onion's juices and braise more than fry them. Added the chicken and browned on each side. Removed the chicken, added flour to make the onions into a roux, and whisked in the chicken stock (with a fork - it still worked!). Brought to a boil and added the chicken back to the pan.

I put the pasta in heavily salted water for fifteen minutes and let both pans simmer. When the pasta was nearly cooked, I drained it and added it to the chicken pan, along with the cream, wine, and a beaten egg. The mixture simmered for about ten more minutes while I added other flavours to taste.